最近公司某项目计划对数据库进行水平分库处理,因此需要实现程序根据参数自动切换数据库的功能。
本文讲述如何在 Spring Cloud + MyBatis + Druid + Oracle 环境下实现动态数据源切换的功能。
配置数据源
在两个 Oracle 数据库创建 Person 表,并插入几行数据:
1
2
3
4
5
6
7
8
9
| create table Person
(
id NUMBER(8) not null,
name VARCHAR2(64) not null
)
INSERT INTO Person (id, name) VALUES (1, 'Leo');
INSERT INTO Person (id, name) VALUES (2, 'Lee');
INSERT INTO Person (id, name) VALUES (3, 'Lih');
|
为便于标识不同数据库的数据,可以将第三行 insert 语句改为:
1
| INSERT INTO Person (id, name) VALUES (3, 'LeoLee');
|
创建一个 Spring Boot 项目,其 application.yml 文件添加两个 Oracle 库的连接信息:
1
2
3
4
5
6
7
8
9
10
11
12
13
14
15
16
17
18
19
20
21
22
23
24
25
26
27
28
29
30
31
32
33
34
35
36
37
38
39
40
| spring:
application:
name: multisource-service
datasource:
druid:
web-stat-filter:
enabled: true
url-pattern: /*
exclusions: "*.js,*.gif,*.jpg,*.png,*.css,*.ico,/druid/*,"
stat-view-servlet:
enabled: true
login-username: admin
login-password: admin
reset-enable: false
url-pattern: /druid/*
total:
url: jdbc:oracle:thin:@(DESCRIPTION = (ADDRESS_LIST =(ADDRESS = (PROTOCOL = TCP) (HOST = 10.88.115.103 )(PORT = 1521))) (CONNECT_DATA = (SERVICE_NAME = trade) ) )
username: user
password: passwd
driver-class-name: oracle.jdbc.OracleDriver
initial-size: 32
max-active: 32
min-idle: 5
max-wait: 60000
part1:
url: jdbc:oracle:thin:@(DESCRIPTION = (ADDRESS_LIST =(ADDRESS = (PROTOCOL = TCP) (HOST = 10.88.115.94 )(PORT = 1521))) (CONNECT_DATA = (SERVICE_NAME = trade) ) )
username: user
password: passwd
driver-class-name: oracle.jdbc.OracleDriver
initial-size: 32
max-active: 32
min-idle: 5
max-wait: 60000
mybatis:
mapperLocations: classpath:mapper/*.xml
|
由于使用 Druid 作为数据库连接池,故添加了 Druid 连接池的配置,并添加了 Druid 监控页面的配置。有关 Druid 的使用,可以参考 《Spring Boot Druid 使用教程》。
pom.xml 依赖如下:
1
2
3
4
5
6
7
8
9
10
11
12
13
14
15
16
17
18
19
20
21
22
23
24
25
26
| <dependencies>
<dependency>
<groupId>org.springframework.boot</groupId>
<artifactId>spring-boot-starter-web</artifactId>
</dependency>
<dependency>
<groupId>com.alibaba</groupId>
<artifactId>druid-spring-boot-starter</artifactId>
<version>1.2.4</version>
</dependency>
<dependency>
<groupId>org.mybatis.spring.boot</groupId>
<artifactId>mybatis-spring-boot-starter</artifactId>
<version>2.1.3</version>
</dependency>
<dependency>
<groupId>com.oracle</groupId>
<artifactId>ojdbc8</artifactId>
<version>12.2.0.1.0</version>
</dependency>
<dependency>
<groupId>org.springframework.boot</groupId>
<artifactId>spring-boot-starter-test</artifactId>
<scope>test</scope>
</dependency>
</dependencies>
|
由于需要连接 oracle 数据库,故引入了 ojdbc8 依赖,ojdb8 下载链接:https://www.oracle.com/database/technologies/jdbc-ucp-122-downloads.html。下载后,可以安装到本地然后引入 pom.xml 使用,如何安装本地 Maven 依赖,请自行百度或 Google。
开发动态数据源
1、定义数据源枚举类型
DatabaseType 定义如下,这里定义了两个数据源,读者可以根据实际情况,自行添加调整:
1
2
3
4
5
6
7
8
9
10
11
12
13
14
15
16
17
18
19
20
| public enum DatabaseType {
TOTAL("total", "1"),
PART1("part1", "2");
private final String name;
private final String value;
DatabaseType(String name, String value) {
this.name = name;
this.value = value;
}
public String getName() {
return name;
}
public String getValue() {
return value;
}
}
|
2、定义线程安全的数据源容器
定义 DatabaseContextHolder:
1
2
3
4
5
6
7
8
9
10
11
| public class DatabaseContextHolder {
private static final ThreadLocal<DatabaseType> contextHolder = new ThreadLocal<>();
public static void setDatabaseType(DatabaseType type){
contextHolder.set(type);
}
public static DatabaseType getDatabaseType(){
return contextHolder.get();
}
}
|
需要定义一个线程安全的容器,用来存储当前使用的数据源,这是由于在客户端并发请求环境下,避免不同线程之间数据相互影响。
3、定义数据源获取方法
定义 determineCurrentLookupKey 方法,这个方法会在框架获取数据源时会被自动调用(读者可以自行设置断点测试一下)。这样一来,通过提前设置好数据源,再调用 determineCurrentLookupKey 方法,即可实现动态数据源的目的。
1
2
3
4
5
| public class DynamicDataSource extends AbstractRoutingDataSource {
protected Object determineCurrentLookupKey() {
return DatabaseContextHolder.getDatabaseType();
}
}
|
4、配置 MyBatis
在 MybatisConfig 中, 创建两个 数据源 DataSource ,分别为 dataSourceTotal 和 dataSourcePart1,并创建动态数据源 dynamicDataSource,最后根据动态数据源创建 SqlSessionFactory ,即 sessionFactory。
1
2
3
4
5
6
7
8
9
10
11
12
13
14
15
16
17
18
19
20
21
22
23
24
25
26
27
28
29
30
31
32
33
34
35
36
37
38
39
40
41
42
43
44
45
| @Configuration
@MapperScan(basePackages="me.leehao.multidbsource.mapper", sqlSessionFactoryRef="sessionFactory")
public class MybatisConfig {
@Autowired
Environment environment;
@Bean(name = "dataSourceTotal")
@ConfigurationProperties(prefix = "spring.datasource.druid.total")
public DataSource getDateSourceTotal()
{
return DruidDataSourceBuilder.create().build();
}
@Bean(name = "dataSourcePart1")
@ConfigurationProperties(prefix = "spring.datasource.druid.part1")
public DataSource getDateSourcePart1()
{
return DruidDataSourceBuilder.create().build();
}
@Bean(name="dynamicDataSource")
public DynamicDataSource DataSource(@Qualifier("dataSourceTotal") DataSource dataSourceTotal,
@Qualifier("dataSourcePart1") DataSource dataSourcePart1){
Map<Object, Object> targetDataSource = new HashMap<>();
targetDataSource.put(DatabaseType.TOTAL, dataSourceTotal);
targetDataSource.put(DatabaseType.PART1, dataSourcePart1);
DynamicDataSource dataSource = new DynamicDataSource();
dataSource.setTargetDataSources(targetDataSource);
dataSource.setDefaultTargetDataSource(dataSourceTotal);
return dataSource;
}
@Bean(name="sessionFactory")
public SqlSessionFactory sessionFactory(@Qualifier("dynamicDataSource")DynamicDataSource dataSource)
throws Exception{
SqlSessionFactoryBean sessionFactoryBean = new SqlSessionFactoryBean();
sessionFactoryBean.setDataSource(dataSource);
PathMatchingResourcePatternResolver resolver = new PathMatchingResourcePatternResolver();
sessionFactoryBean.setMapperLocations(
resolver.getResources(Objects.requireNonNull(environment.getProperty("mybatis.mapperLocations"))));
return sessionFactoryBean.getObject();
}
}
|
为指定 Mapper 类的扫描路径,使用了注解 @MapperScan(basePackages="me.leehao.multidbsource.mapper", 。有关如何使用 MyBatis ,可以参考文章 《Spring Boot MyBatis 学习教程》。
5、开发 REST 测试接口
为测试根据请求参数动态选择数据源的功能,定义接口 /person:
1
2
3
4
5
6
7
8
9
10
11
| @RestController
public class PersonController {
@Resource
private PersonService personService;
@RequestMapping(value = "/person", method = RequestMethod.GET)
public String errMsg(@RequestParam(value="db", required=true)String db,
@RequestParam(value="id", required=true)Integer id) {
return personService.getPerson(db, id);
}
}
|
接口 /person 根据 db 参数来确定使用哪个数据库。
运行
调用 http://127.0.0.1:8080/person?db=1&id=3,返回:
LeoLee
调用 http://127.0.0.1:8080/person?db=2&id=3,返回
Lih
说明实现了根据不同请求参数选择不同数据源的功能。
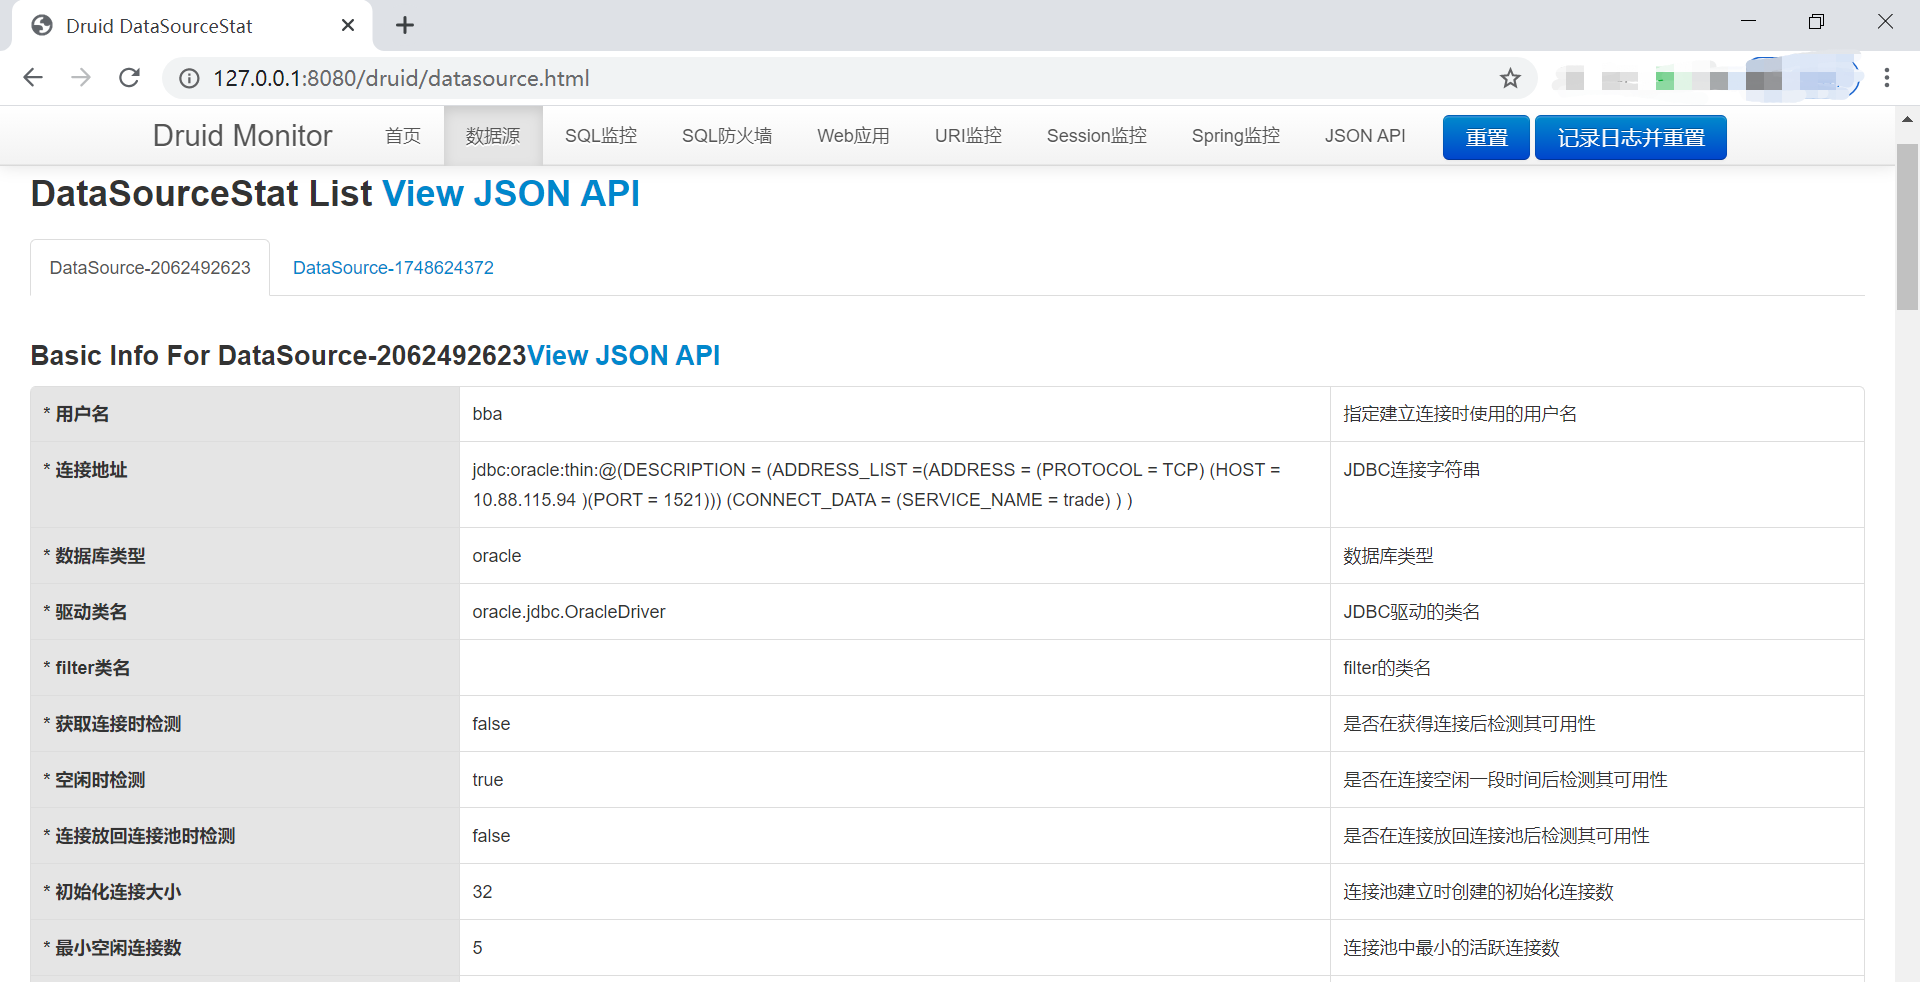
Druid 监控
打开 Druid 监控页面,可以看到两个数据源的监控数据:
附:完整源代码
https://github.com/haozlee/springcloudstudy/tree/main/multidbsource
参考资料